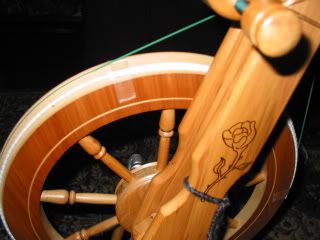
What have I been up to? Well, I'm still spinning and in fact, I've been trying to devise a way to get the "umph" back into my lace spinning. I call it the "mojo"... its the added inertia that my Alpaca spinning wheel had due to its heavier flywheel. My Rose wheel more than makes up for the loss of inertia in that it has higher ratios and spins smoother, plus its just a prettier wheel, IMHO and I love meditativeness (is that a word?) of watching the beautiful spoked wheel spin... On the downside, my feet miss the inertia - My Alpaca wheel was like driving a car that idles too high and always wants to take off on you. I don't want that "take off" feeling all the time, but sometimes I feel like a jet and sometimes I feel like a kite. Sometimes I feel like spinning on a riceburner and other times I feel like spinning on a Harley (motorcycle references). I'd love to have a choice of both. What can I say, I want it all.
Armed with all these jet/kite/motorcyle thoughts in my mind I set out to find a way to make my Rose wheel heavier. I still think the Buckyballs would work well, but I question how much weight they'd actually add. They're pricey too and I don't want to spend $55 for some magnetic beads only to find out I need to spend $100 just to come close to the weight I need. That's when it came to me... I had something at home that would be thin enough, heavy enough and that I could attach to my wheel easily. My weighted braid! Its commonly used to add weight to the bottom of curtains and draperies. I have a roll of it from my days of making dance flags (looong story). So I figured, what the hay? I might as well try it out. The result was exactly what I was hoping for - I got my mojo back! That little "umph" is back - I can feel the force of the wheel and the inertia that keeps it spinning a second or so longer than normal. It may seem like a small thing, but it makes a big difference to me when I'm spinning lace. Now to find a better way to attach it to the wheel. Glue, staples...?